
User Management & Roles

The Prompt Insight platform gives you the ability to have granular control over who can access which parts of your data. Entering a user into the system enables you to add individuals and grant them access to the application based on their roles and responsibilities.
Setting Up Users
In order to set up Users you must first navigate to the Admin panel. You can find the link to this at the bottom of the left-hand navigation bar. Click “Admin”:


From the next window, click on your organization’s name.

From here you will have access to all the tools in the Organization panel:
Creating a User
Select “Users” from the Organization panel.

Creating a Single User
This workflow is recommended for creating 5 or fewer users. To create a single user, click on “Create”:

Select which roles you'd like to assign to this user by clicking the "Roles" dropdown menu. You can select multiple roles from this dropdown menu. These roles will determine what permissions your new user will have in the platform and what data they can see.

Once you've selected the user roles, you can select which roles you'd like to add your new user to as a Scope. This is necessary if you want any non-Superuser admins to be able to see your new user in Usage Metrics or within the Admin Panel.

You can also optionally click the “+ Add Provider” button to link that user to a provider in your EMR data, if Prompt Insight has ingested your EMR’s retrospective data:

Finally, you’ll want to choose how to set the password for your new user:

- For most users, you will leave the ‘Send “Set Password” Email’ option selected. This will notify your new user that they can create a password and log in to Prompt Insight.
- To create a password manually yourself for a user, select the “Choose Password” option.
- SSO users’ passwords will be managed by their SSO platform, so for those users you should select the ‘Skip’ option.
“Create Another User” from this screen will enable you to quickly create another user after pressing the Create button:

Creating Multiple Users
Should you be creating >5 unique users we suggest using the bulk import method. To initiate this, click on the ellipses from the Users panel and select “Bulk Import Users”.

Download the CSV template under item 1. Save this template on your computer. If your EMR data has been processed by Prompt Insight, the template will be populated with the names and IDs of your providers. Open the CSV in Excel or Google Sheets and fill in the email column with the emails that match the provider names in the spreadsheet, and save your changes. Then, back on the bulk import page, click on “Choose File” and upload the CSV file.

Assigning Roles to Users
Once the CSV file is uploaded you then have several options for assigning roles to your users.

Choose Role(s) to Give to ALL Imported Users
Selecting this option allows you to select one or more previously created roles or to manually create a new role for every user in the imported batch.
Selecting a role from the dropdown menu allows you to link all imported users to an existing role. Clicking on the “+” button will allow you to create a role from this window that will apply to all of the imported users in this step.

Choose Role(s) to Give to EACH Individual Imported User
This option allows for you to either select an existing role for each individual imported user or to manually create a unique role (“+”) a role for each individual imported user. If you choose to create a new role for the user you can follow the same parameters outlined in the previous section. You must choose an existing role or create a new role for each user being uploaded in order to submit the form.

Start the Bulk Import
Once you have selected which role to give your users (in step 3 above) you will see an additional menu selection prompting you to create your users. Keep the checkbox next to “Send ‘Set Password’ emails to new users” checked unless you are using a single sign on (SSO) login for your organization or if you plan on manually setting up your users’ passwords yourself.
For most use cases, it is suggested that you keep the “Set Password” box checked.

Adjusting User Roles
Adding or Removing a Role
To adjust a user's assigned Roles within the Practice Intel backend:
- Go to your organization's User list.
- Click the three dots (...) to the right of the user you want to edit.
- Select Edit.
- Scroll down to the Roles dropdown menu.
- Select only the roles you want to assign to the user.
- If you are adding a new roles
- Click Update.
Please note, when adding a new role to an existing user, you may want to send them an email notification that you've made a change to their account and they now have additional permissions. In order to do this, follow the steps below:
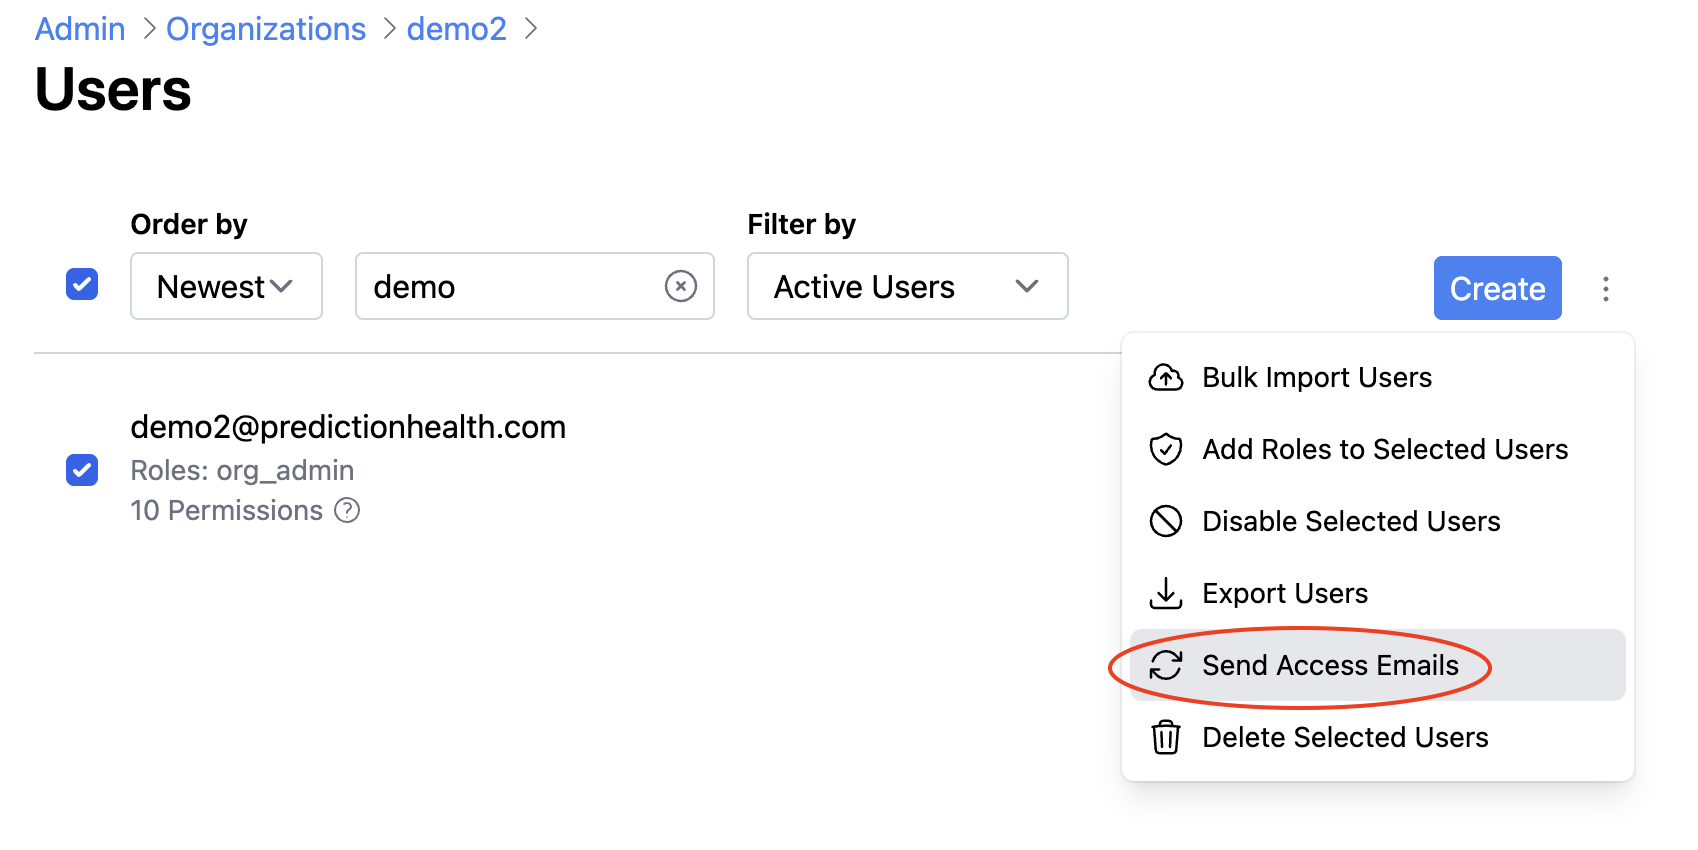
- Navigate to your organization's User list.
- Select the checkbox to the left of the User's email address.
-
Click the three dots in the upper right hand corner of the page, and choose "send access emails".
-
Select which type of email you'd like to send this User:
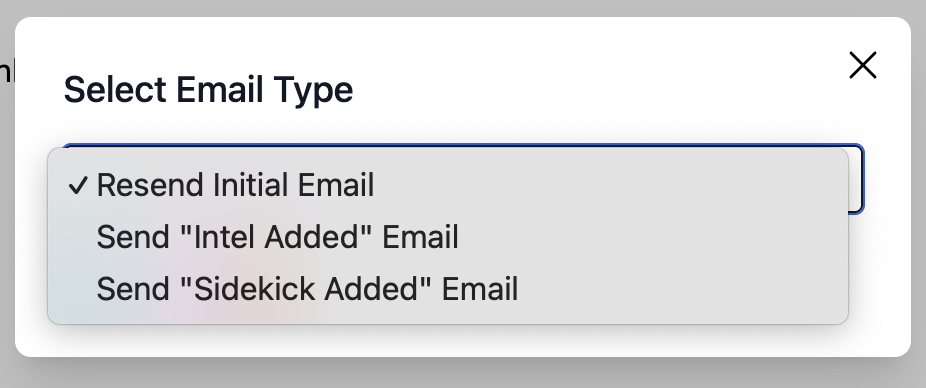
5. Click the blue "Send" button once you've made your selection.


Disabling the User
To disable the user entirely:
- Go to your organization's User list.
- Find the user you want to disable.
- Click the three dots (...) to the right of the user's email address.
- Select Disable.
If you need further assistance please reach out to support.insight@prompthealth.com